
Step-by-Step: Traditional Pottery in Peru

Peruvian pottery is a labor of love and of necessity. Some vessels are adorned with intricate painted iconography, while others are made simply with function in mind. Whether for cooking or fermenting, gathering water, or even burying the dead— as seen in the fifteenth-century funerary urns of Chazuta— pottery in this region emerges from a deep relationship between people, place and purpose.
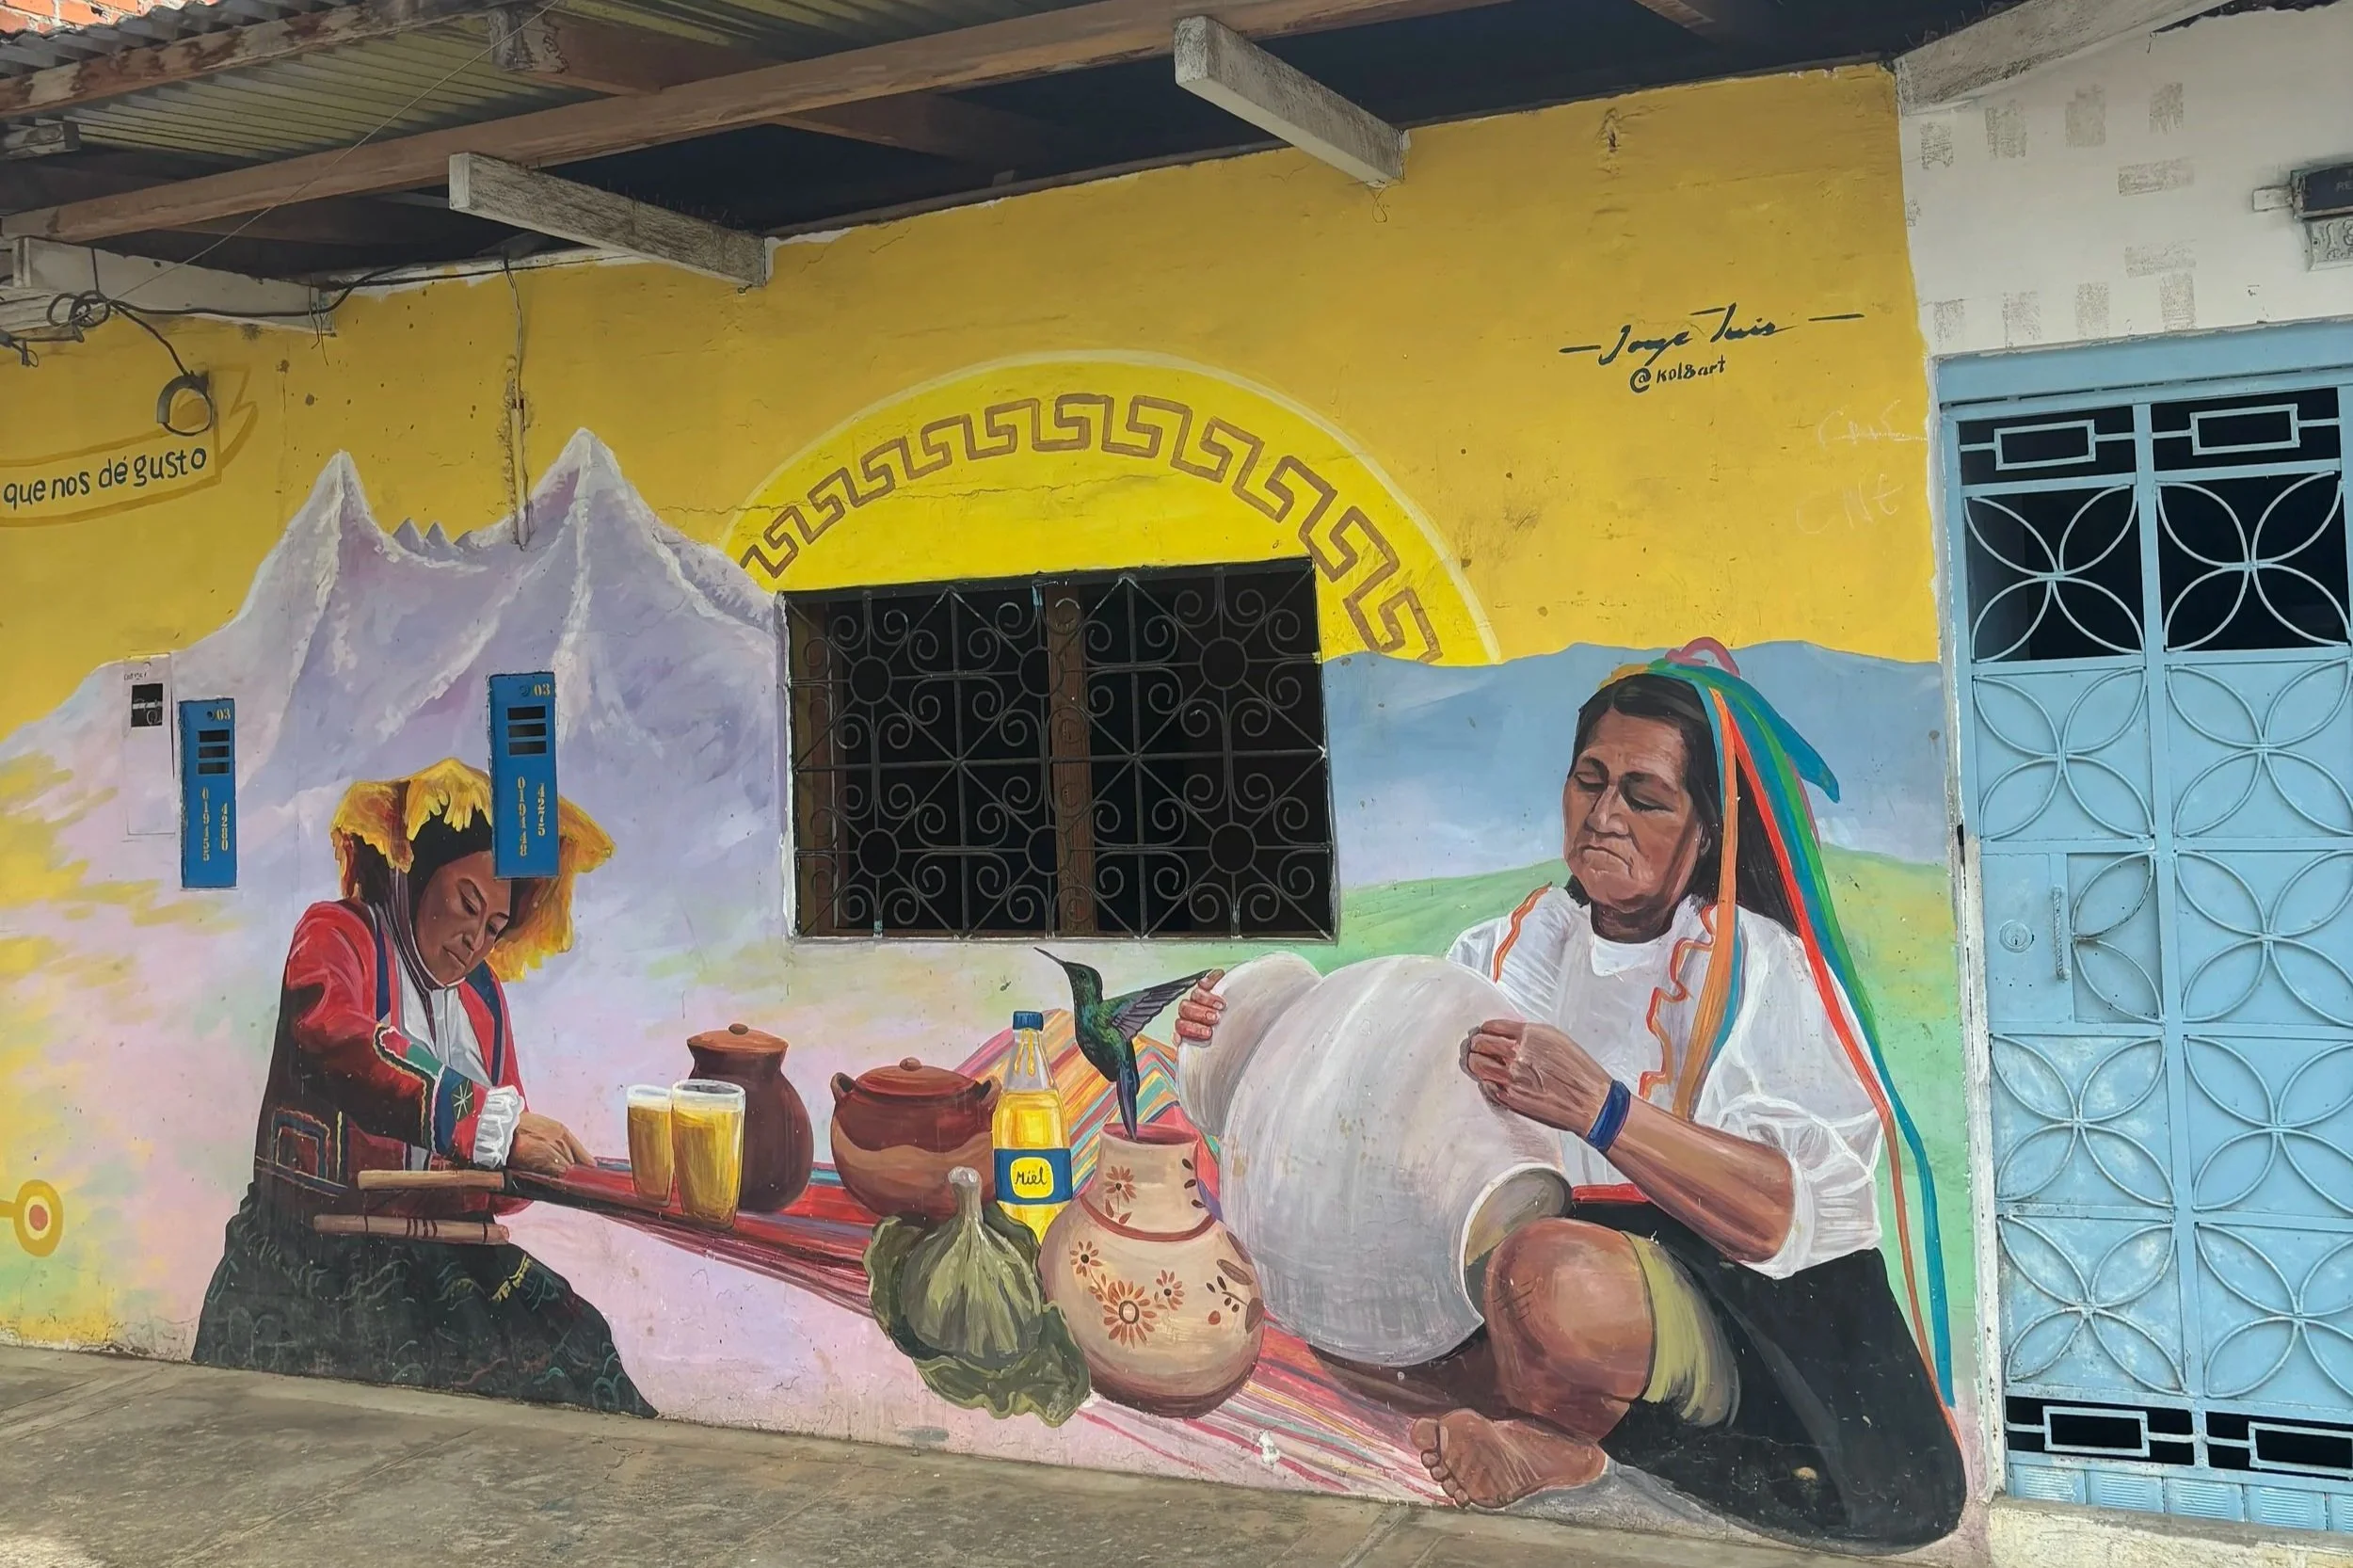
Peruvian potters work with materials gathered from their environment and draw inspiration from the forests, rivers and stories that surround them. Each piece reflects the needs of its community as well as the ancestral traditions that continue to shape daily life.
I am by no means an expert in Peruvian pottery, but I was fortunate to spend time with several groups of women in villages nestled between the high and low jungle of the Peruvian Amazon. The following step-by-step list is drawn from my experiences learning from multiple artisans who generously shared their time, skills, and knowledge.

1. Collecting Clay
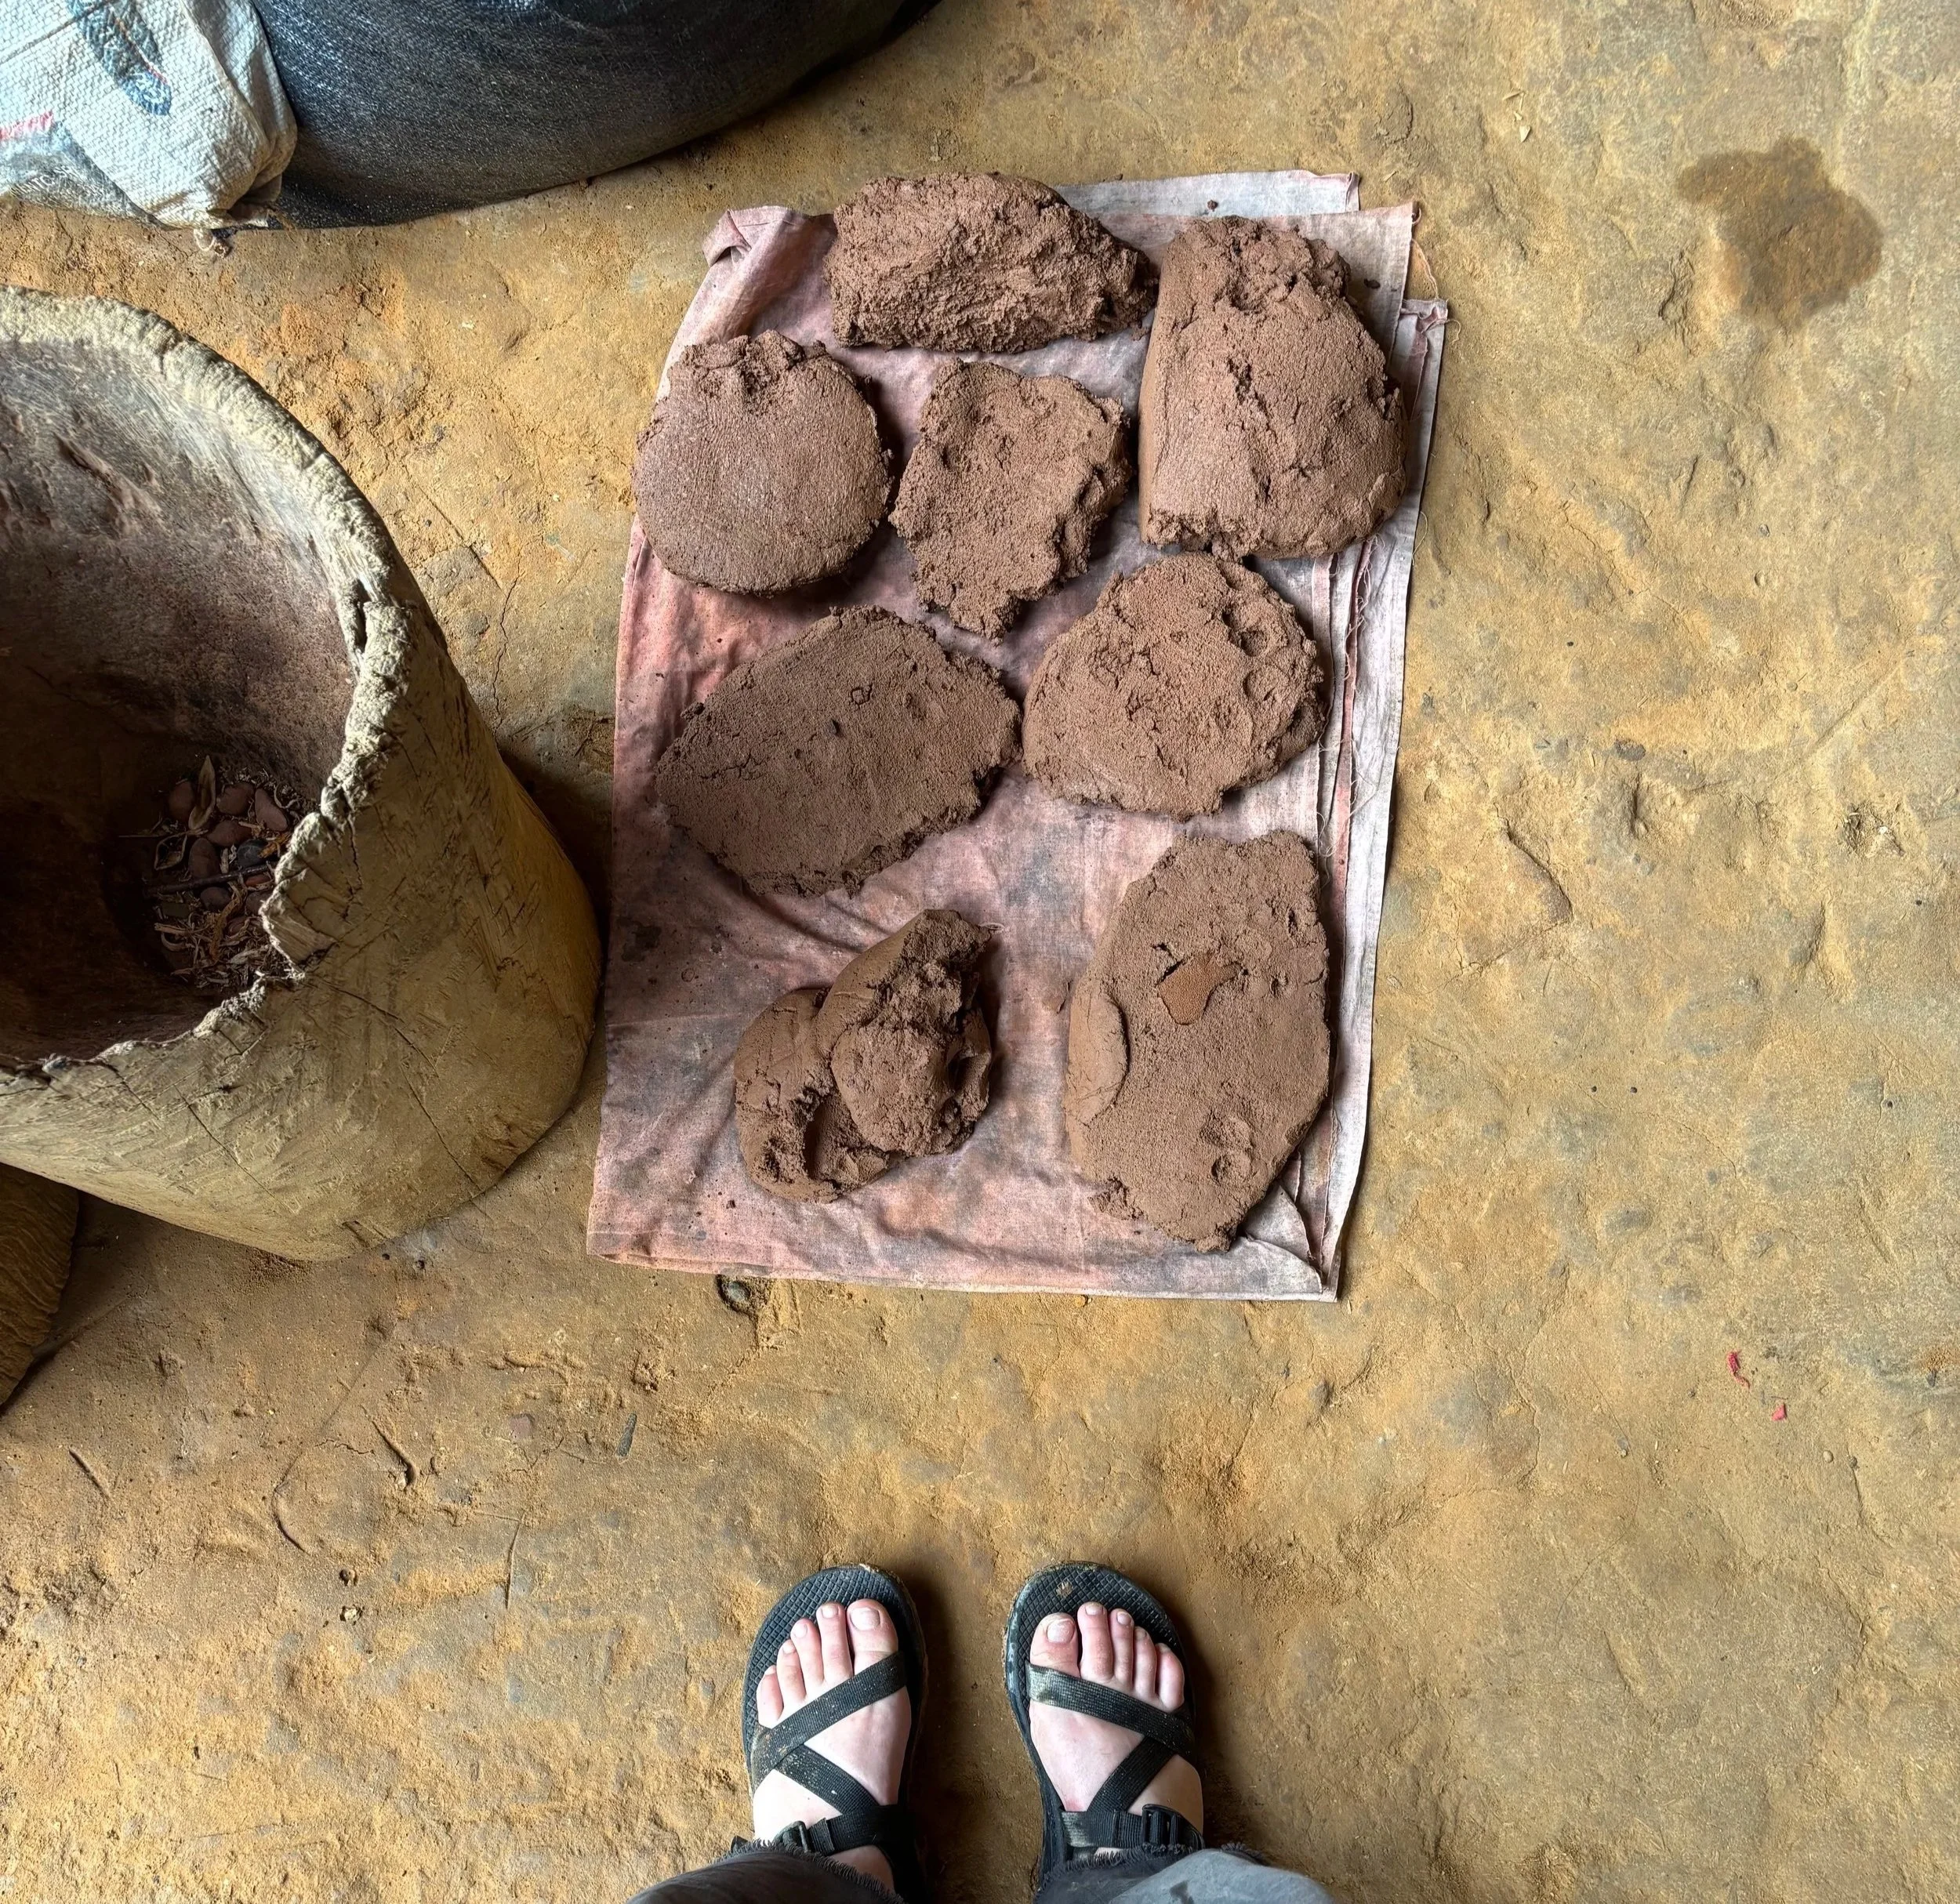
Natural clay is abundant in the low jungle of the Peruvian Amazon, where clay deposits appear in quarries and along riverbeds throughout the region. Clay from this area often yields grey and orange tones. After artisans collect the raw clay, they typically dry it out until it resembles hard rocks, which allows for easier storage before use.
2. Preparing the Clay
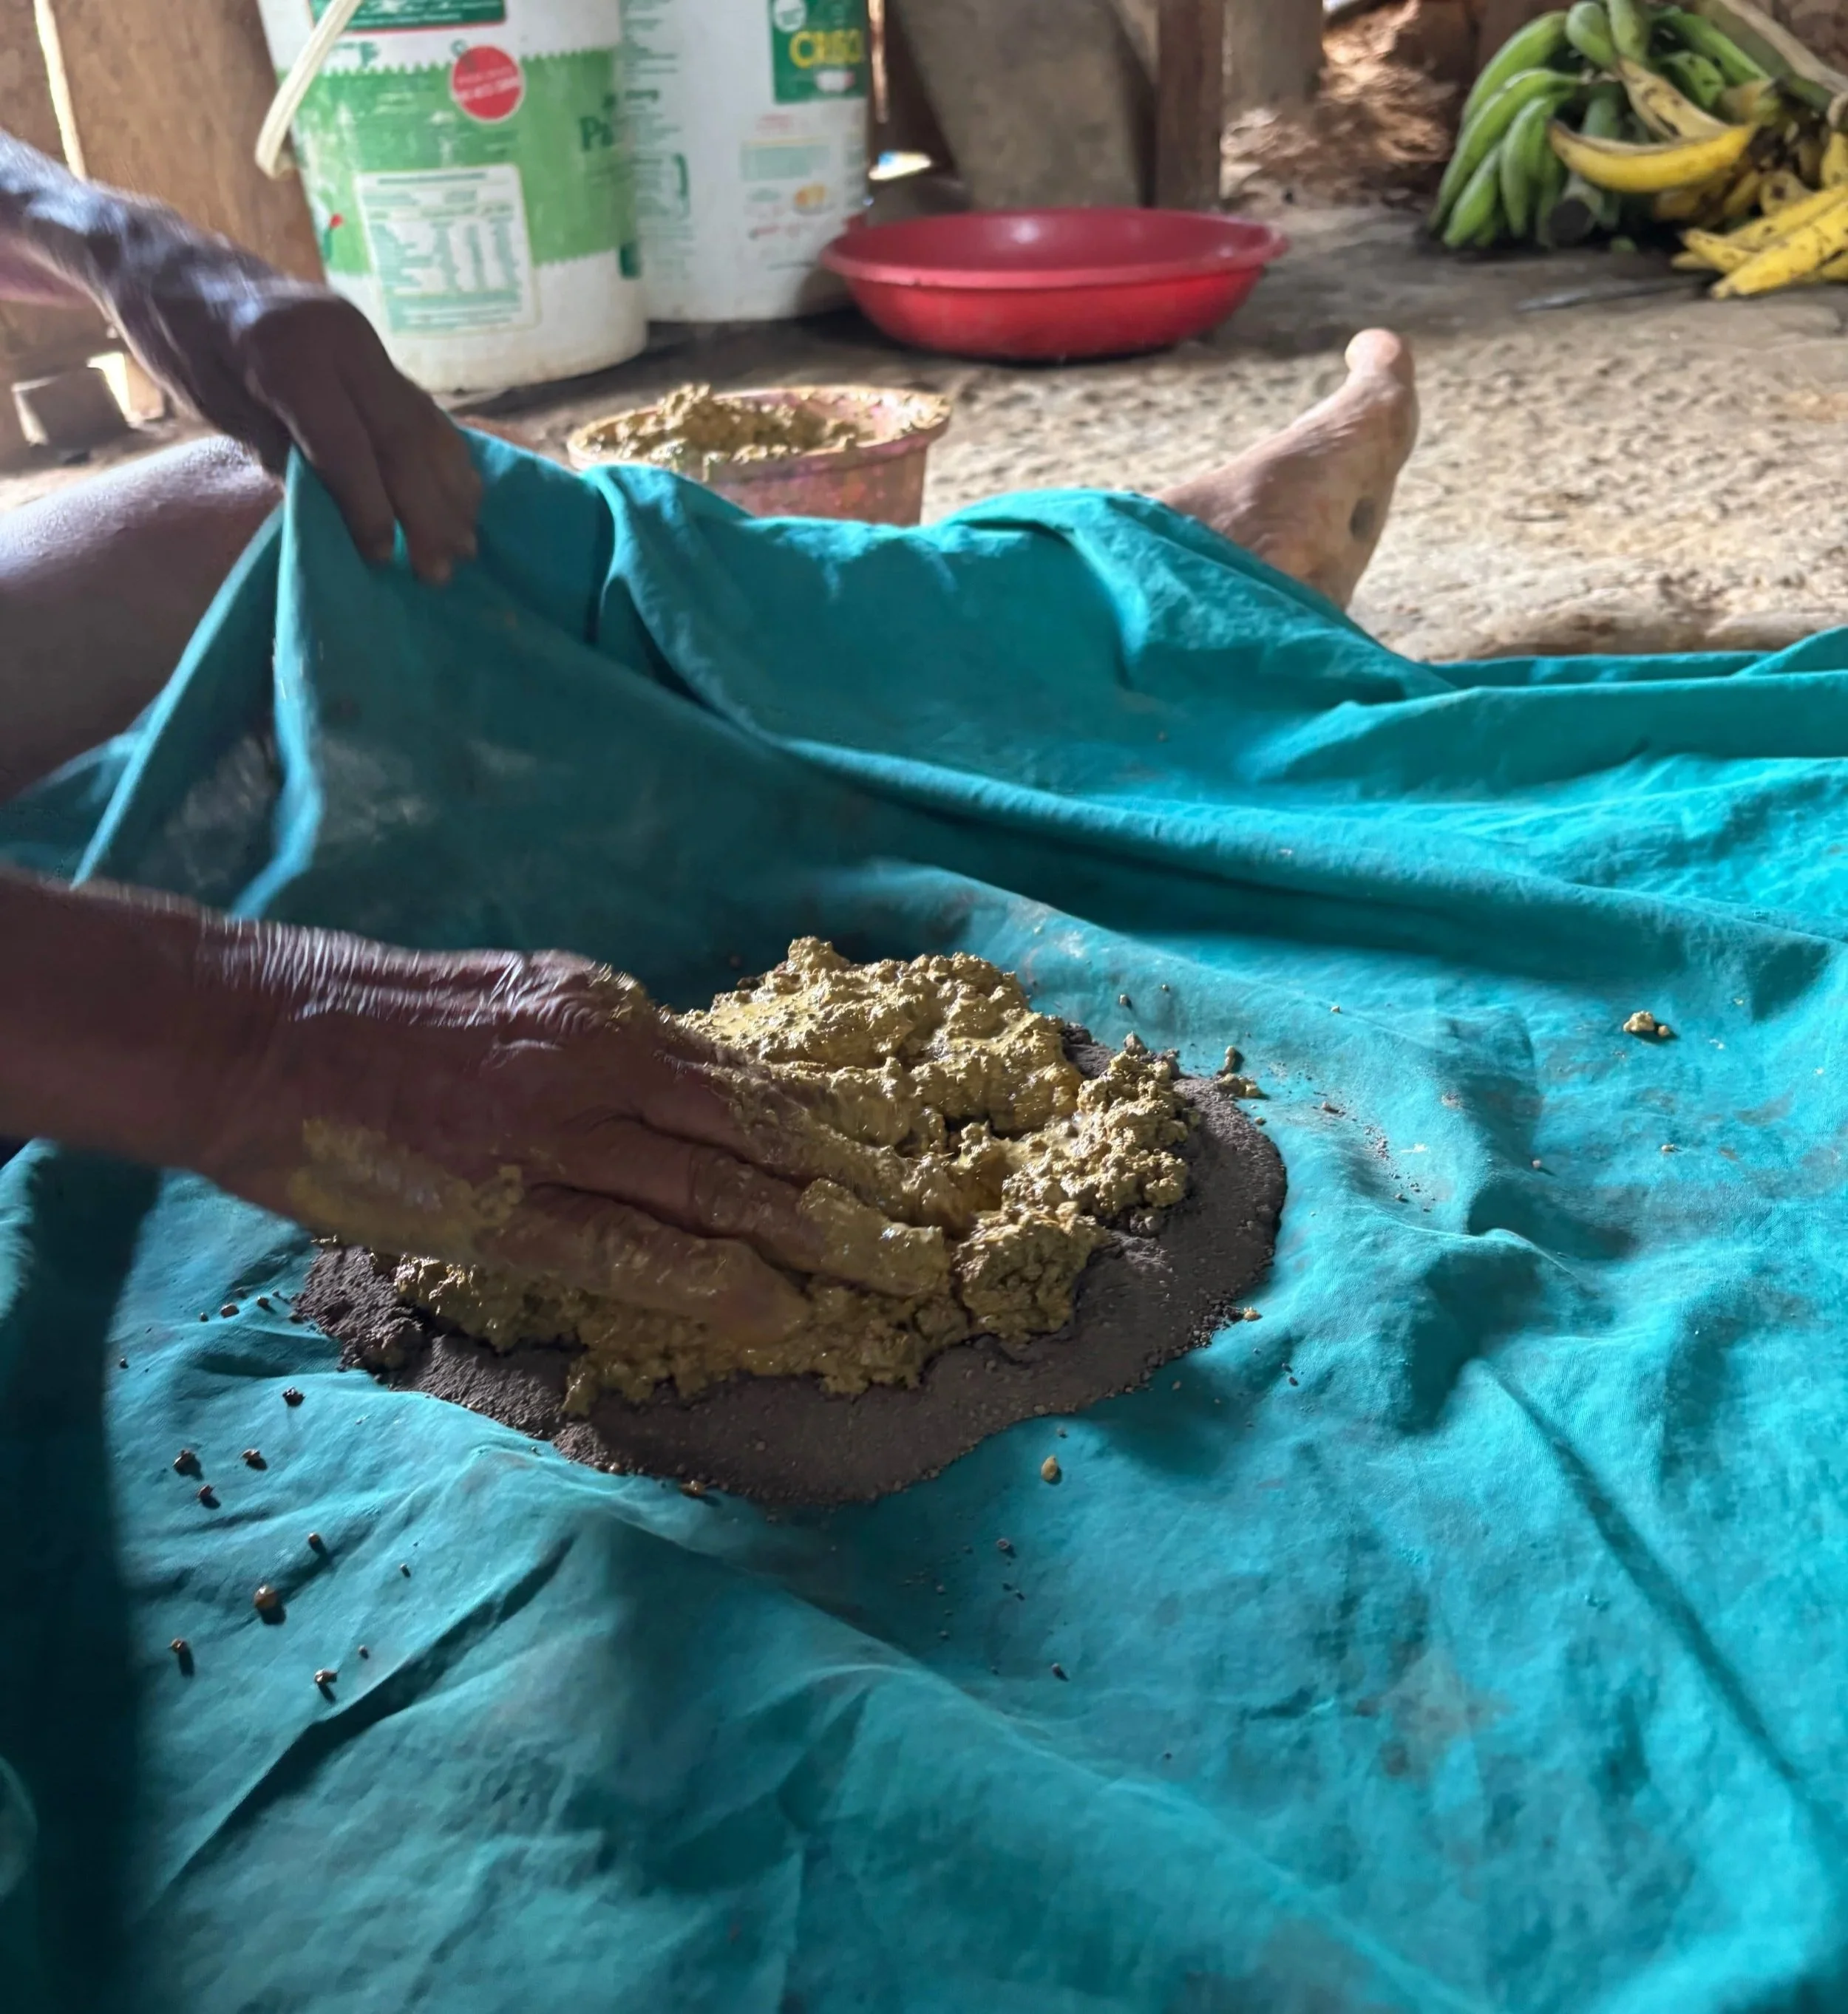
Artisans rehydrate the dried clay chunks by soaking them in water. Once the clay is saturated, they transfer the wet mixture onto a piece of cloth or plastic and begin adding shaño—a coarse or fine powder made by grinding down broken shards of previously fired vessels. The proportion of shaño varies, but the clay requires a significant amount to gain the strength necessary to avoid cracking during firing.
3. Kneading the Clay
Artisans thoroughly incorporate the shaño into the clay body by wedging it with their feet and hands. This process is essential for removing air bubbles and creating a workable, plastic clay body that can be sculpted without cracking.
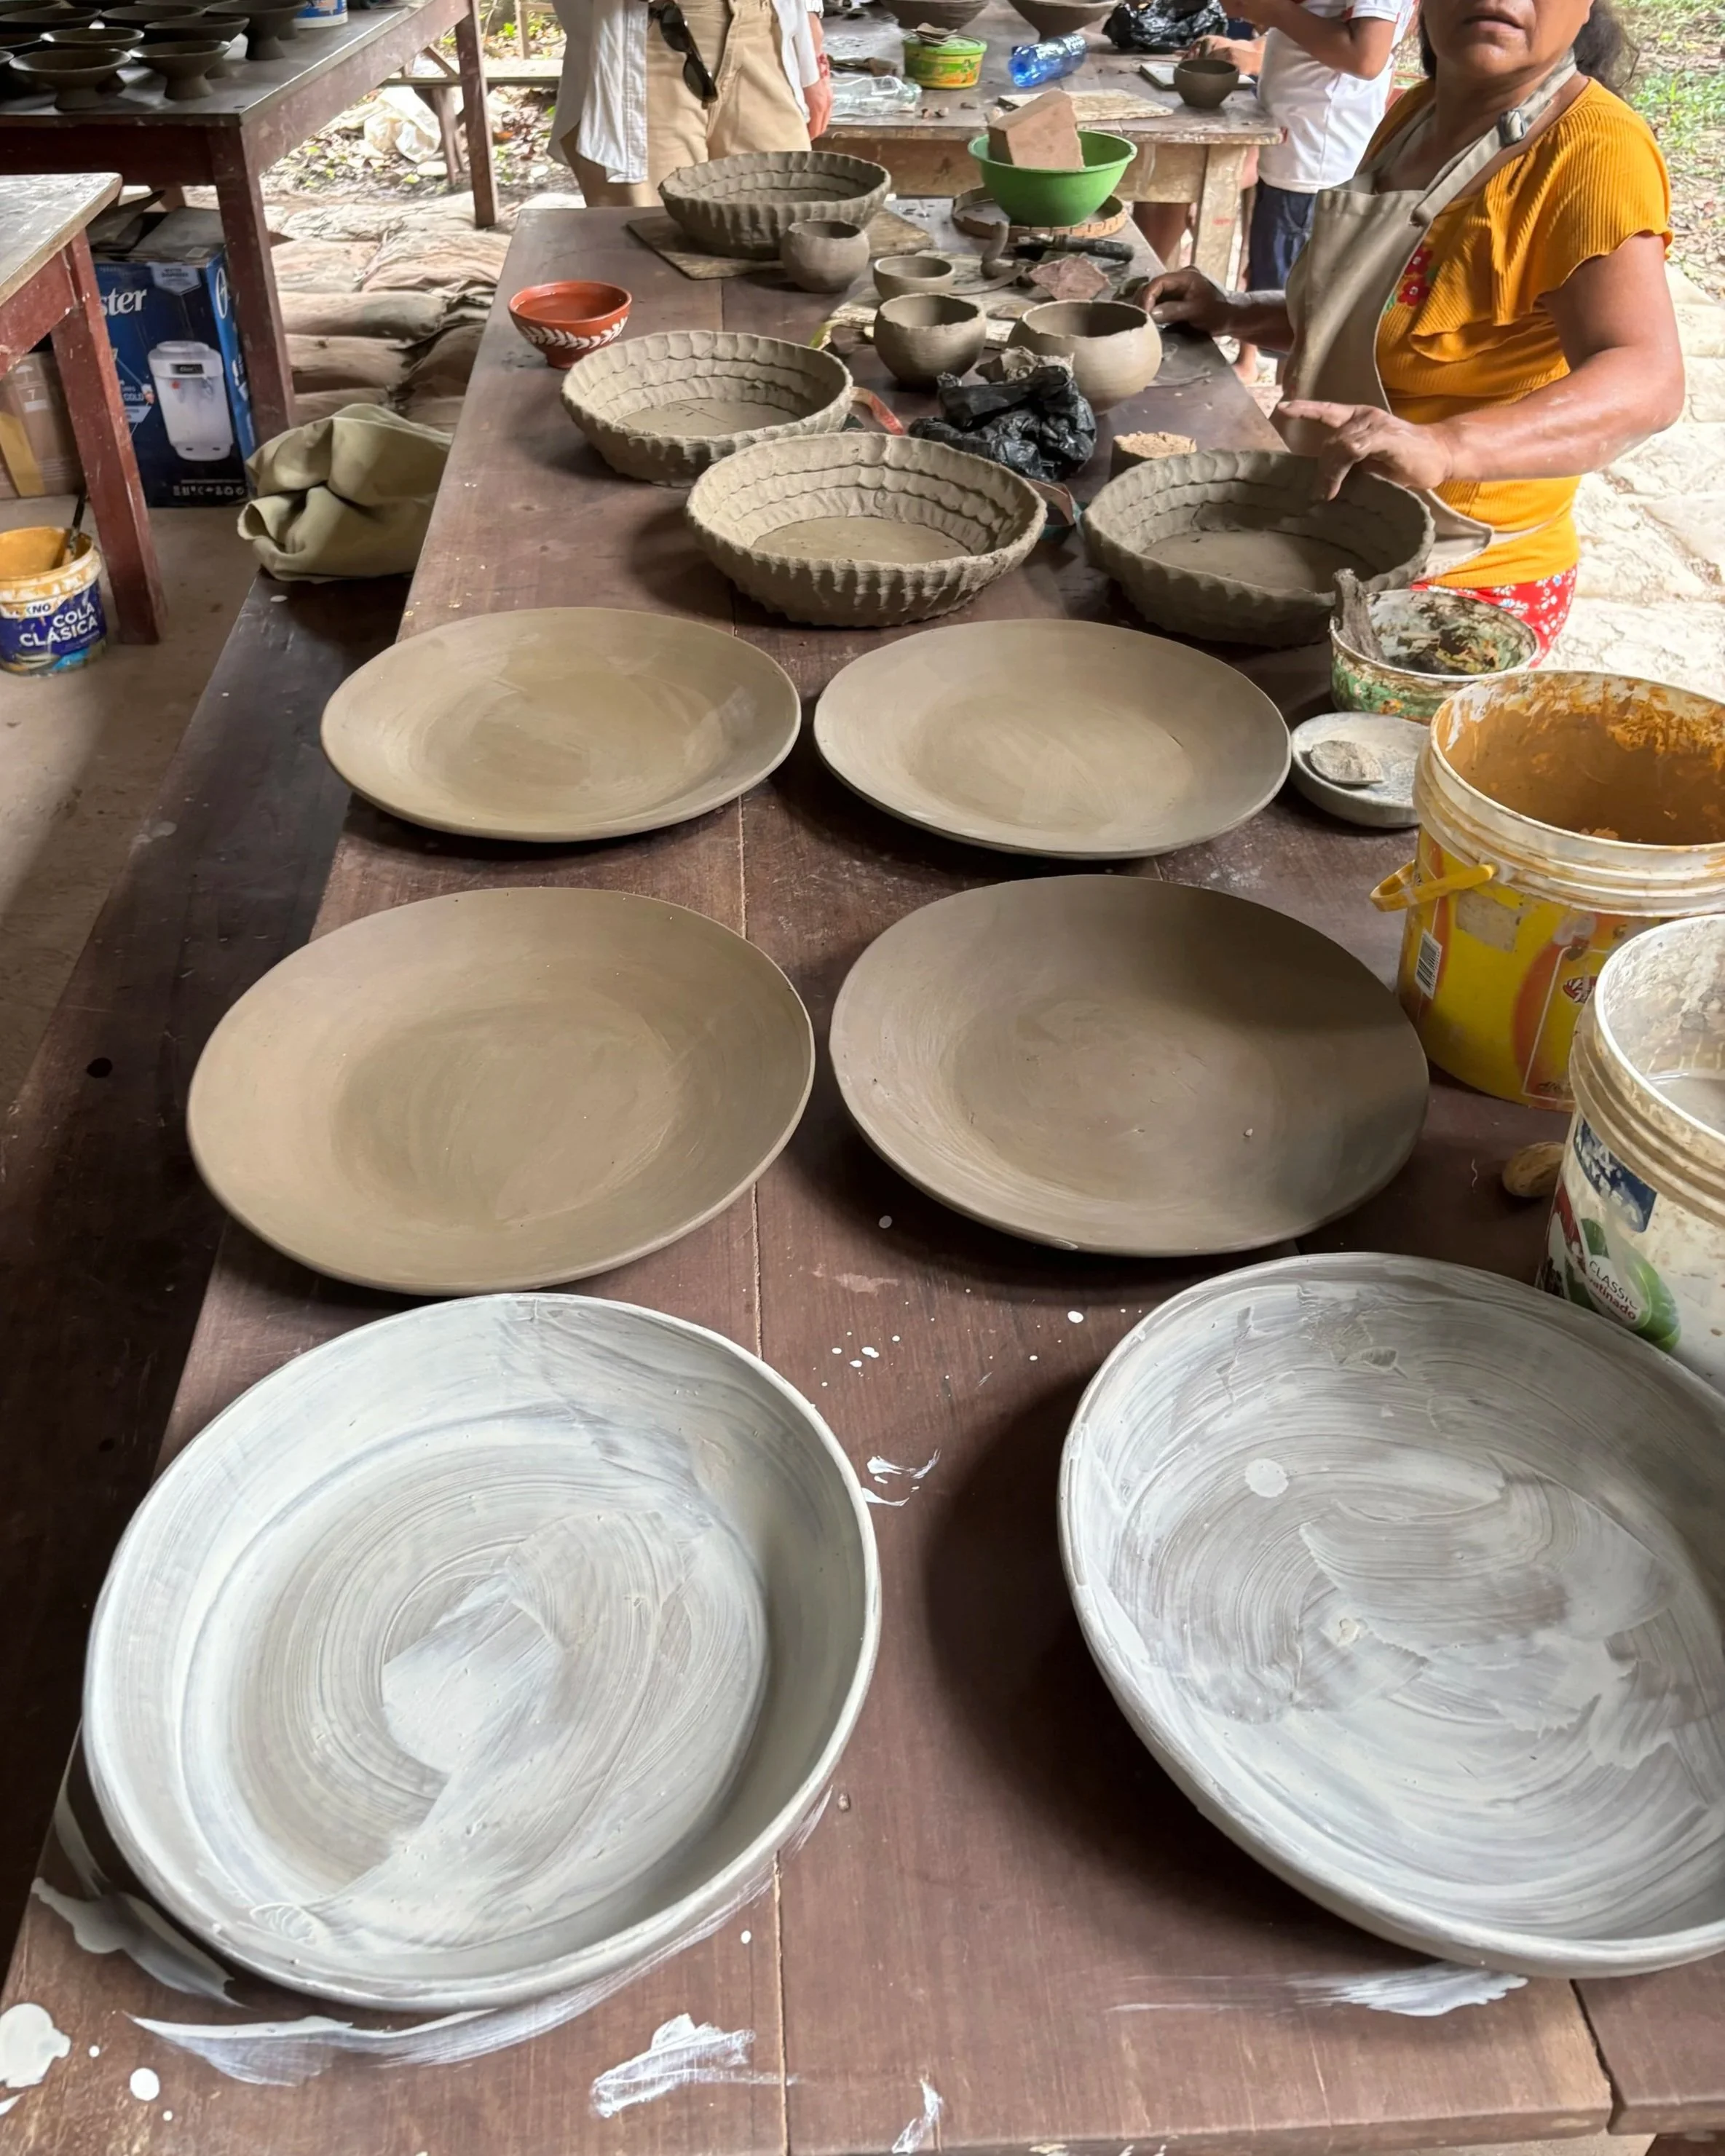
4. Coiling
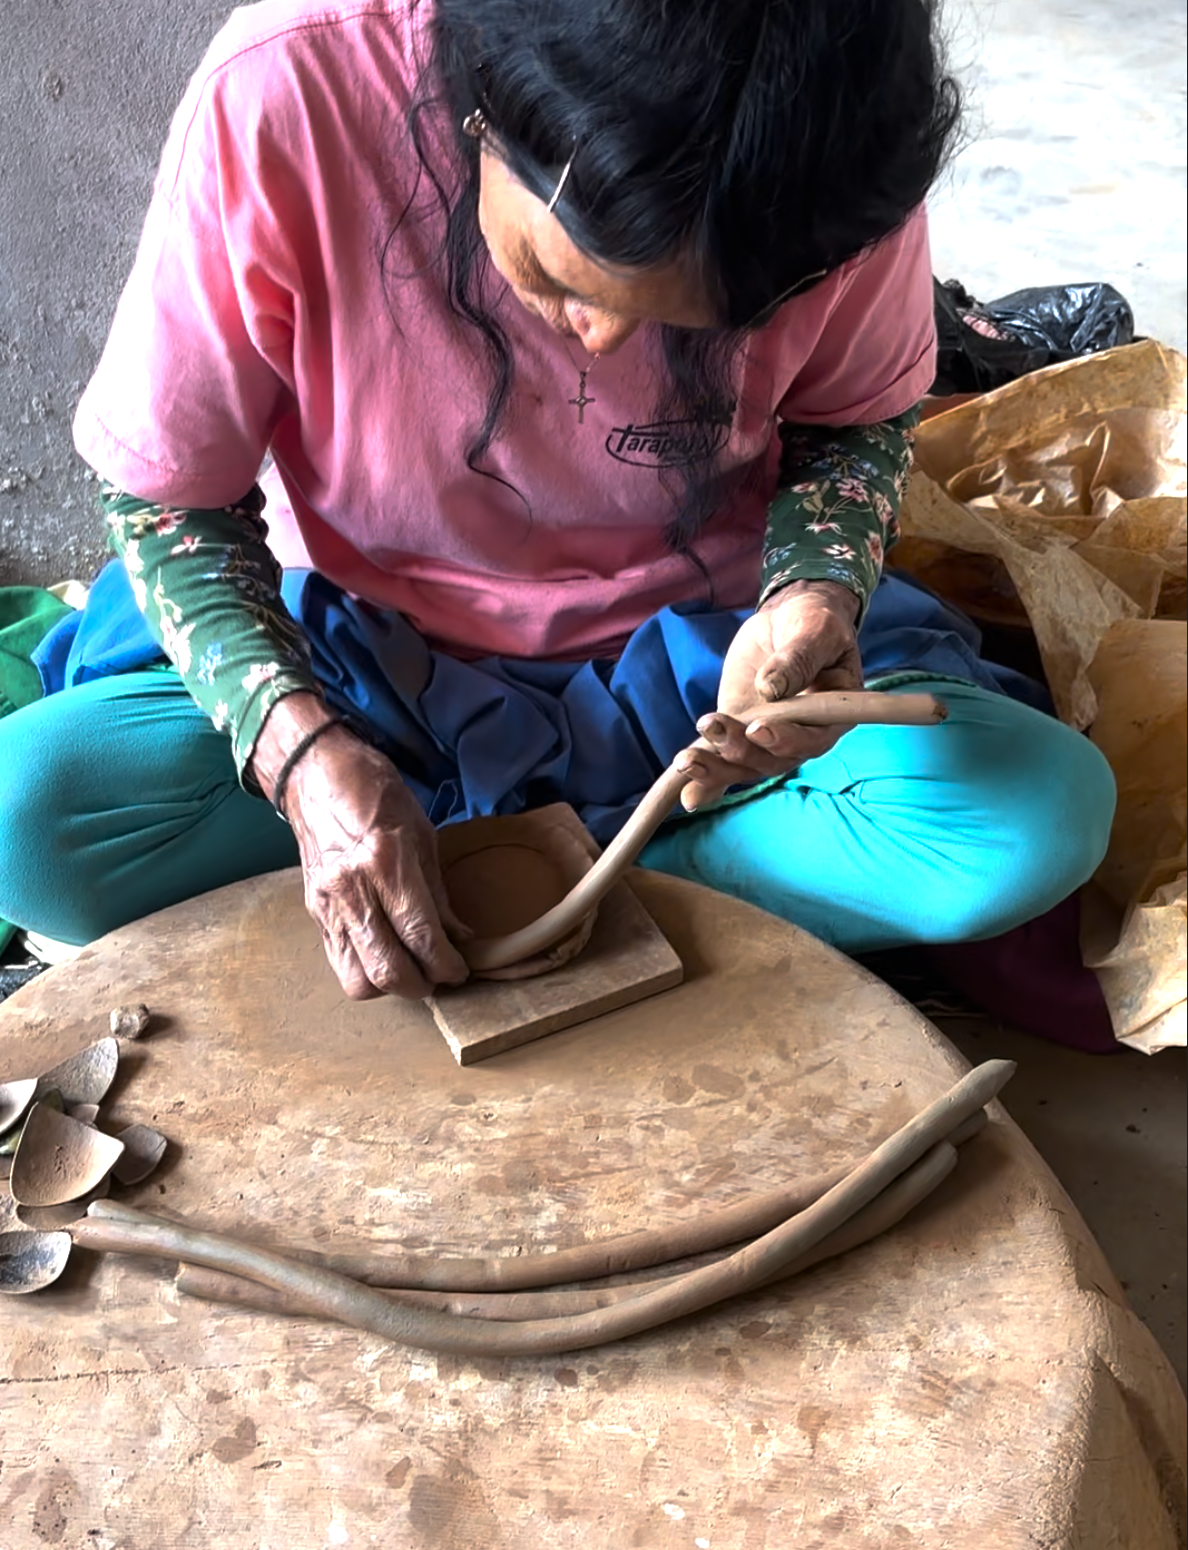
Peruvian artisans use the coil method to form their pots, creating rolls of clay called chunchullis, meaning “guts” in Quechua. The artisan forms a round base by flattening a ball of clay to the desired circumference of the finished vessel. Coils are prepared by rolling out chunks of clay with even pressure. The artisan slowly and evenly presses the coils around the prepared base and continues building upward, compressing and smoothing each coil as the walls rise.
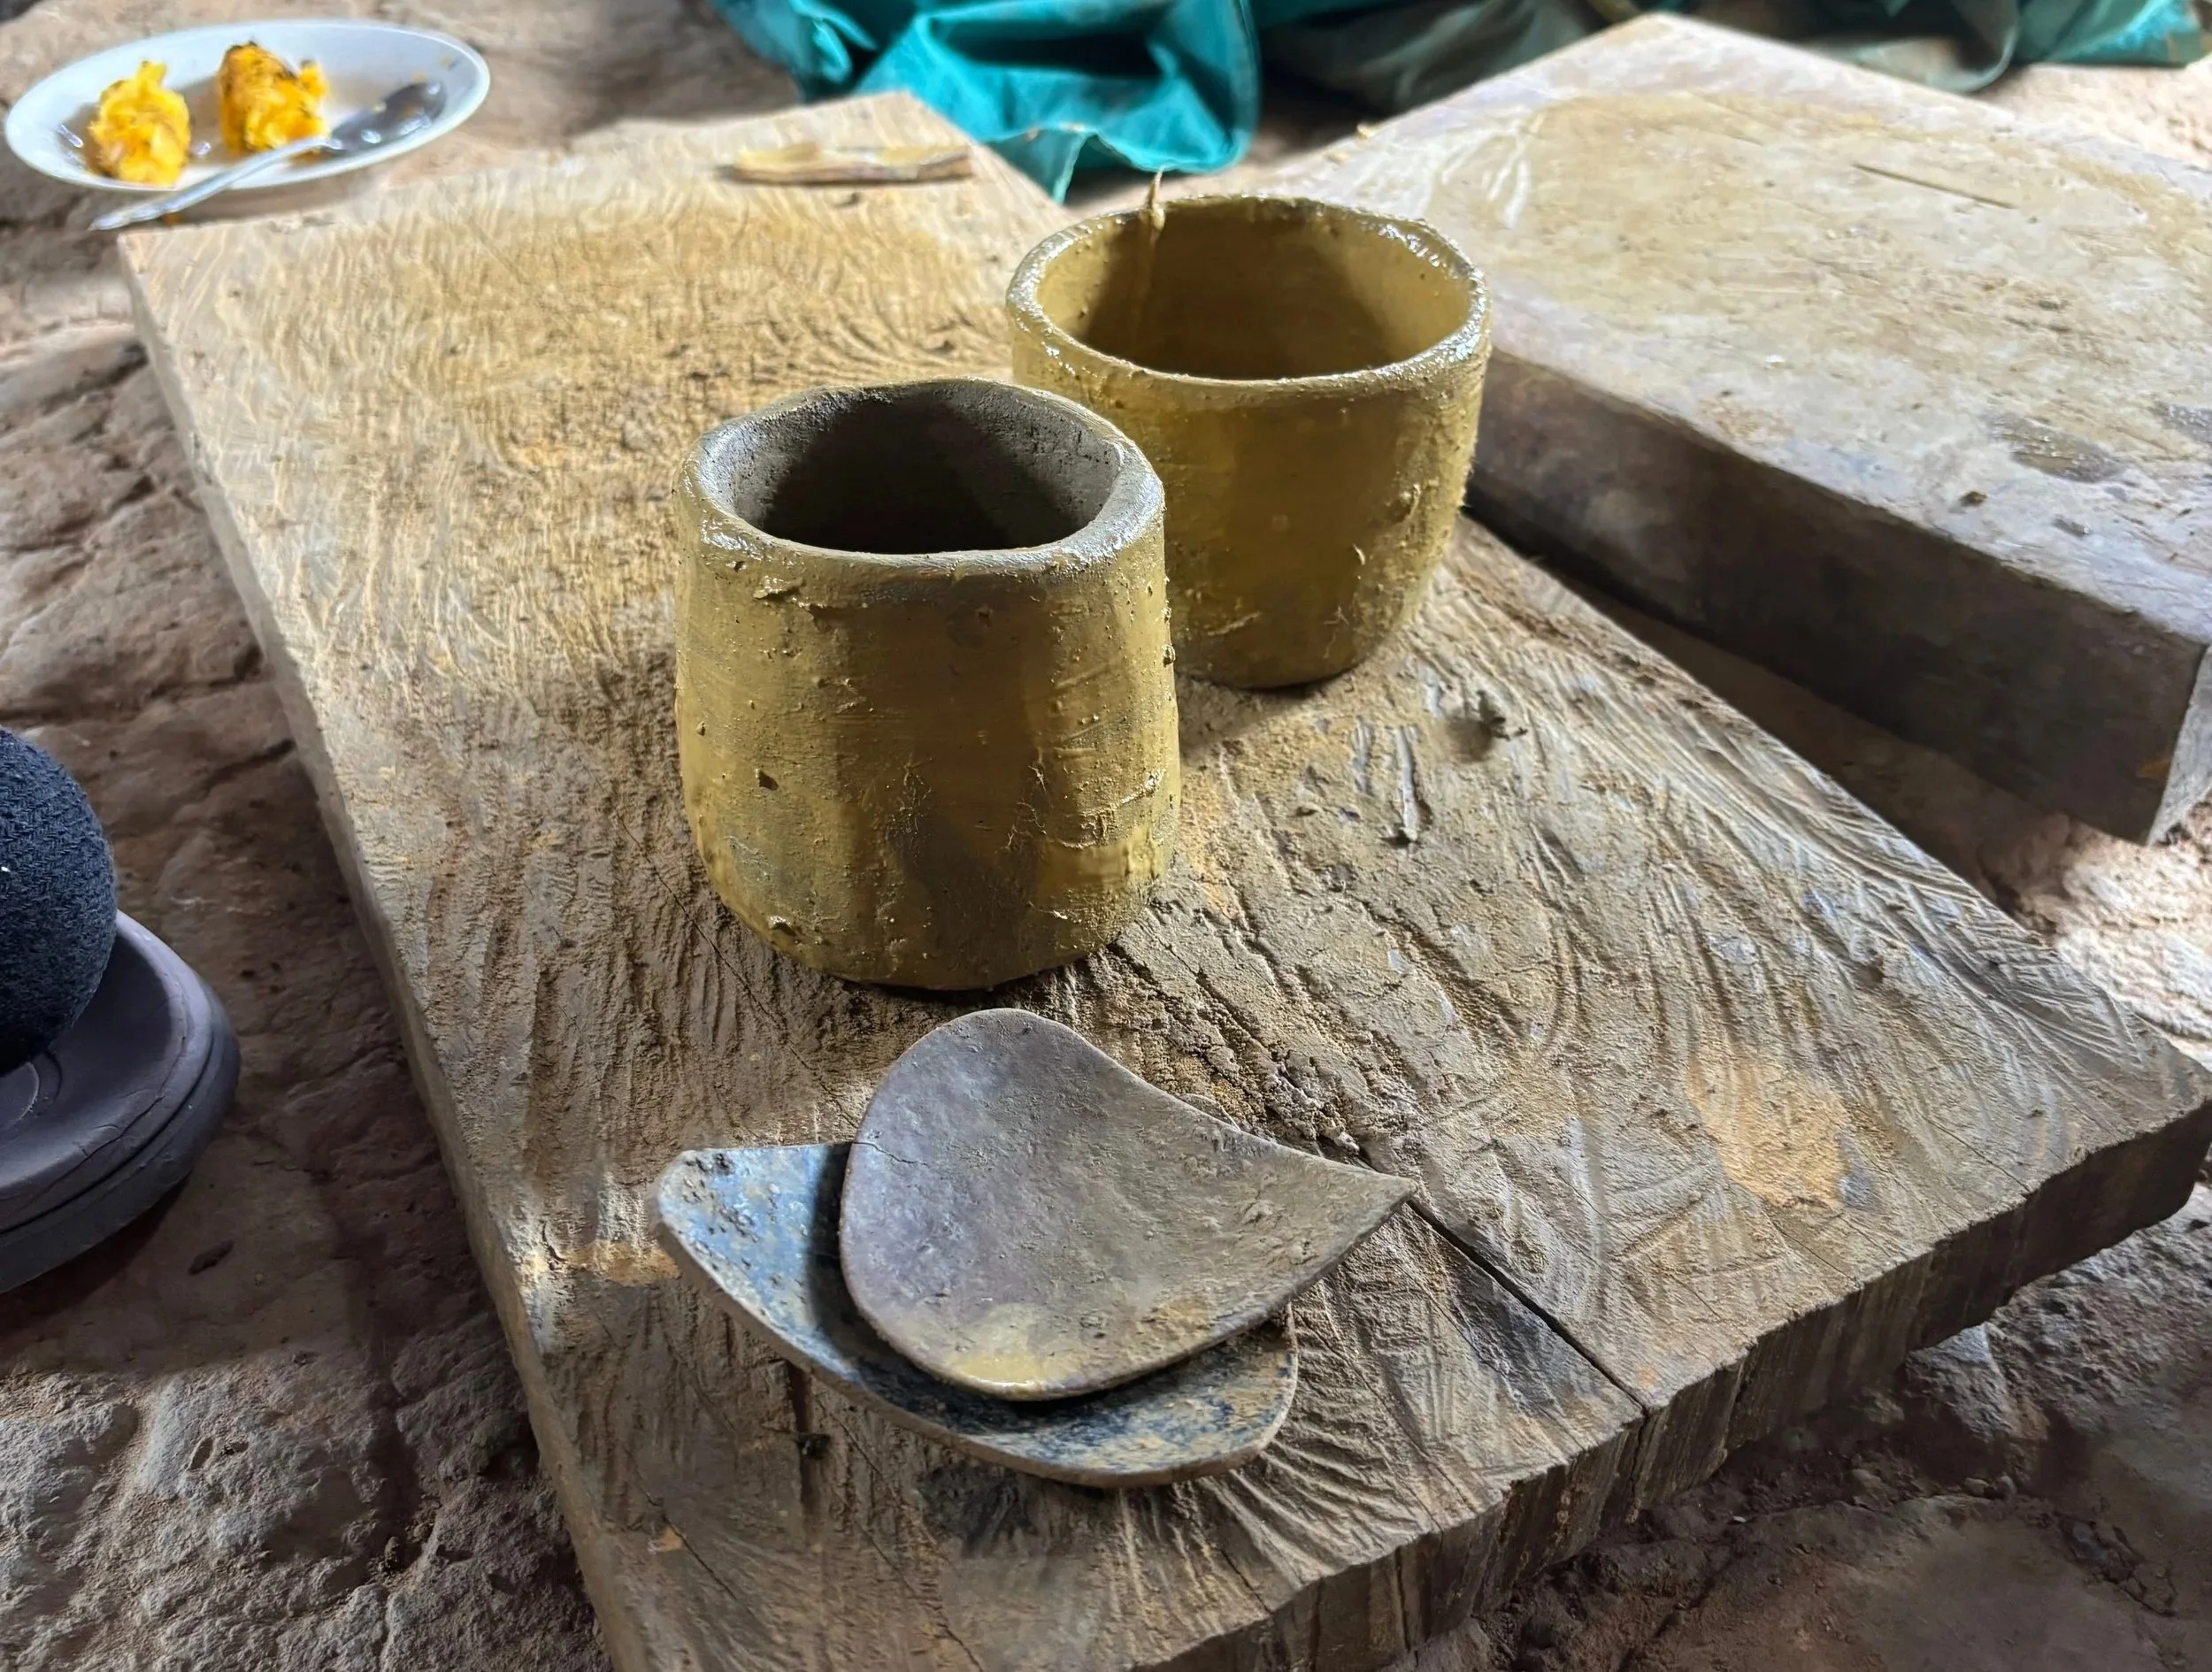
5. Shaping and Smoothing
The artisan smooths any remaining gaps between coils using the index finger or a wooden-like rib (llunguna) made from the dried fruit of the calabash tree (huingo). The tool’s subtle curve and smooth surface make it ideal for compressing and shaping coils.
6. Slip Application
Once the vessel has been shaped and smoothed, the artisan allows it to firm up before applying a layer of white, red, or black clay slip to the entire surface. Common slips include:
Yurackallpa (white clay)
Quilluallpa (yellow clay)
Yanarumi (black stone)
When the slip dries to just past leather-hard, the artisan burnishes the surface using a plantain peel or a polishing stone (tupradora) until it develops a shiny finish.
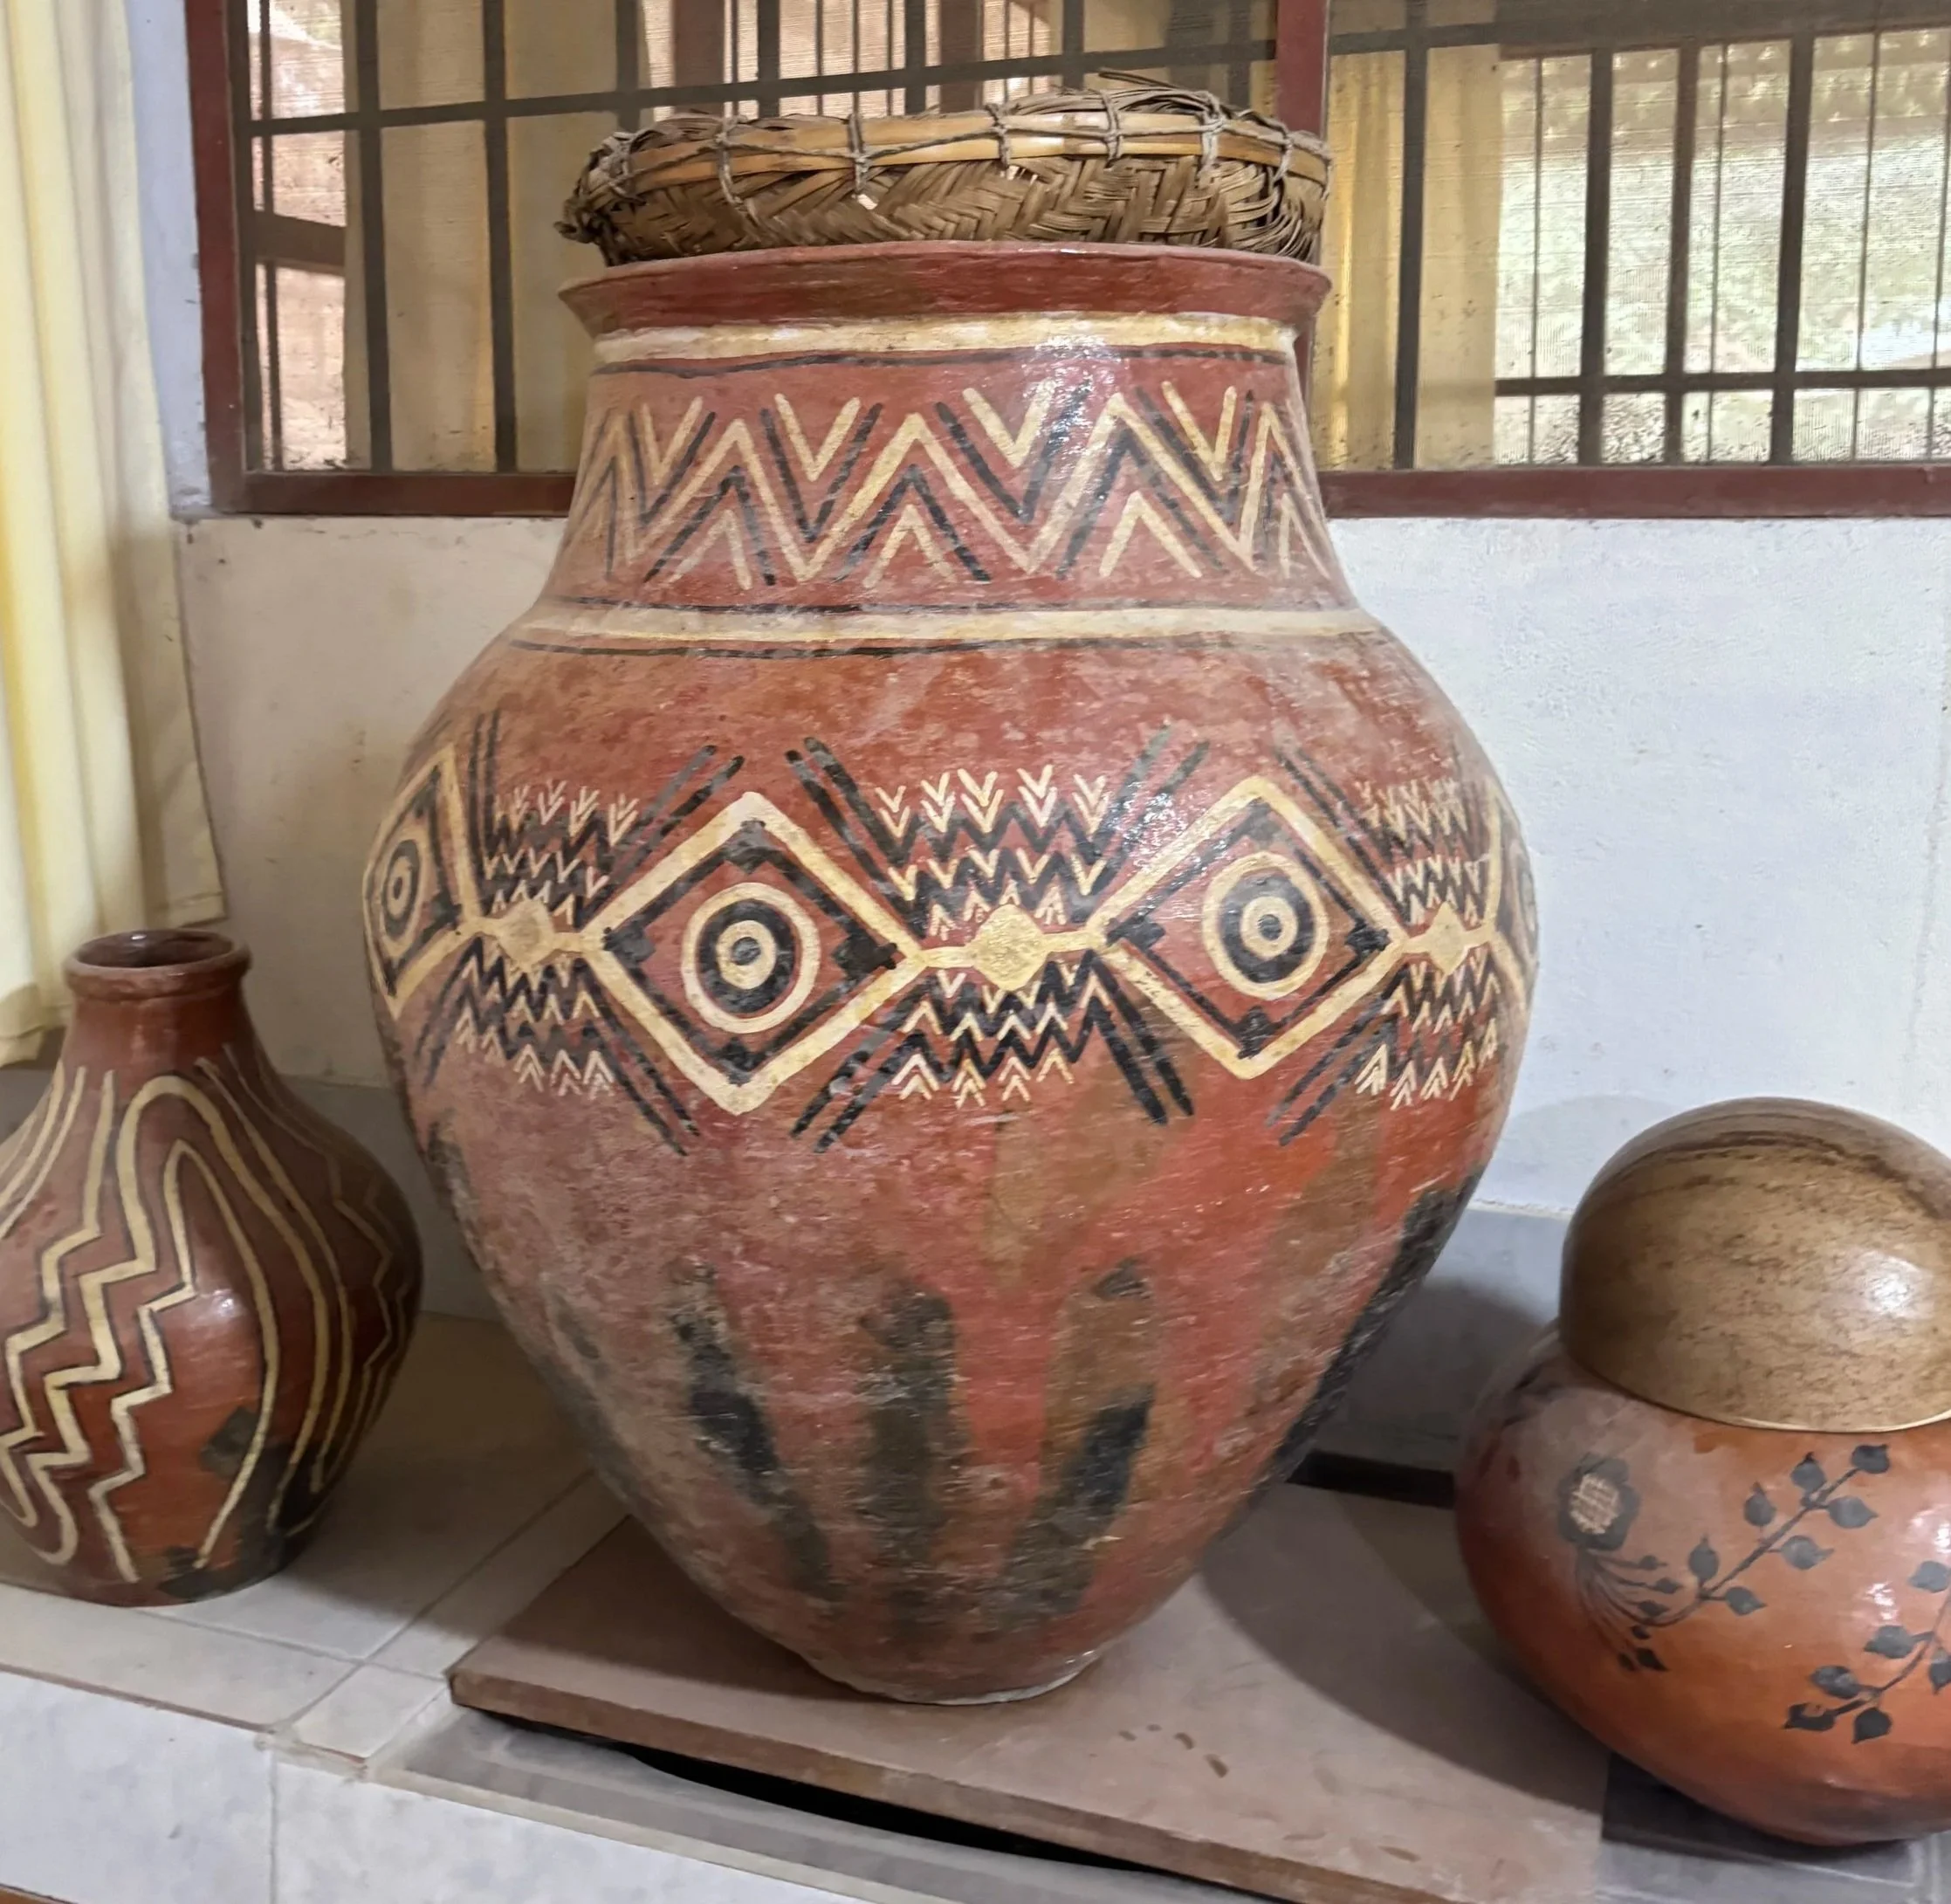
7. Decoration
After burnishing, ceramicists paint the surface of the pots with ancestral iconography featuring geometric patterns and floral designs. In Chazuta, artisans use brushes made from their own hair, called chujchero. Decorative slips are derived from white clay, yellow clay (which fires to red), and pigments made from ground soft black river stones.
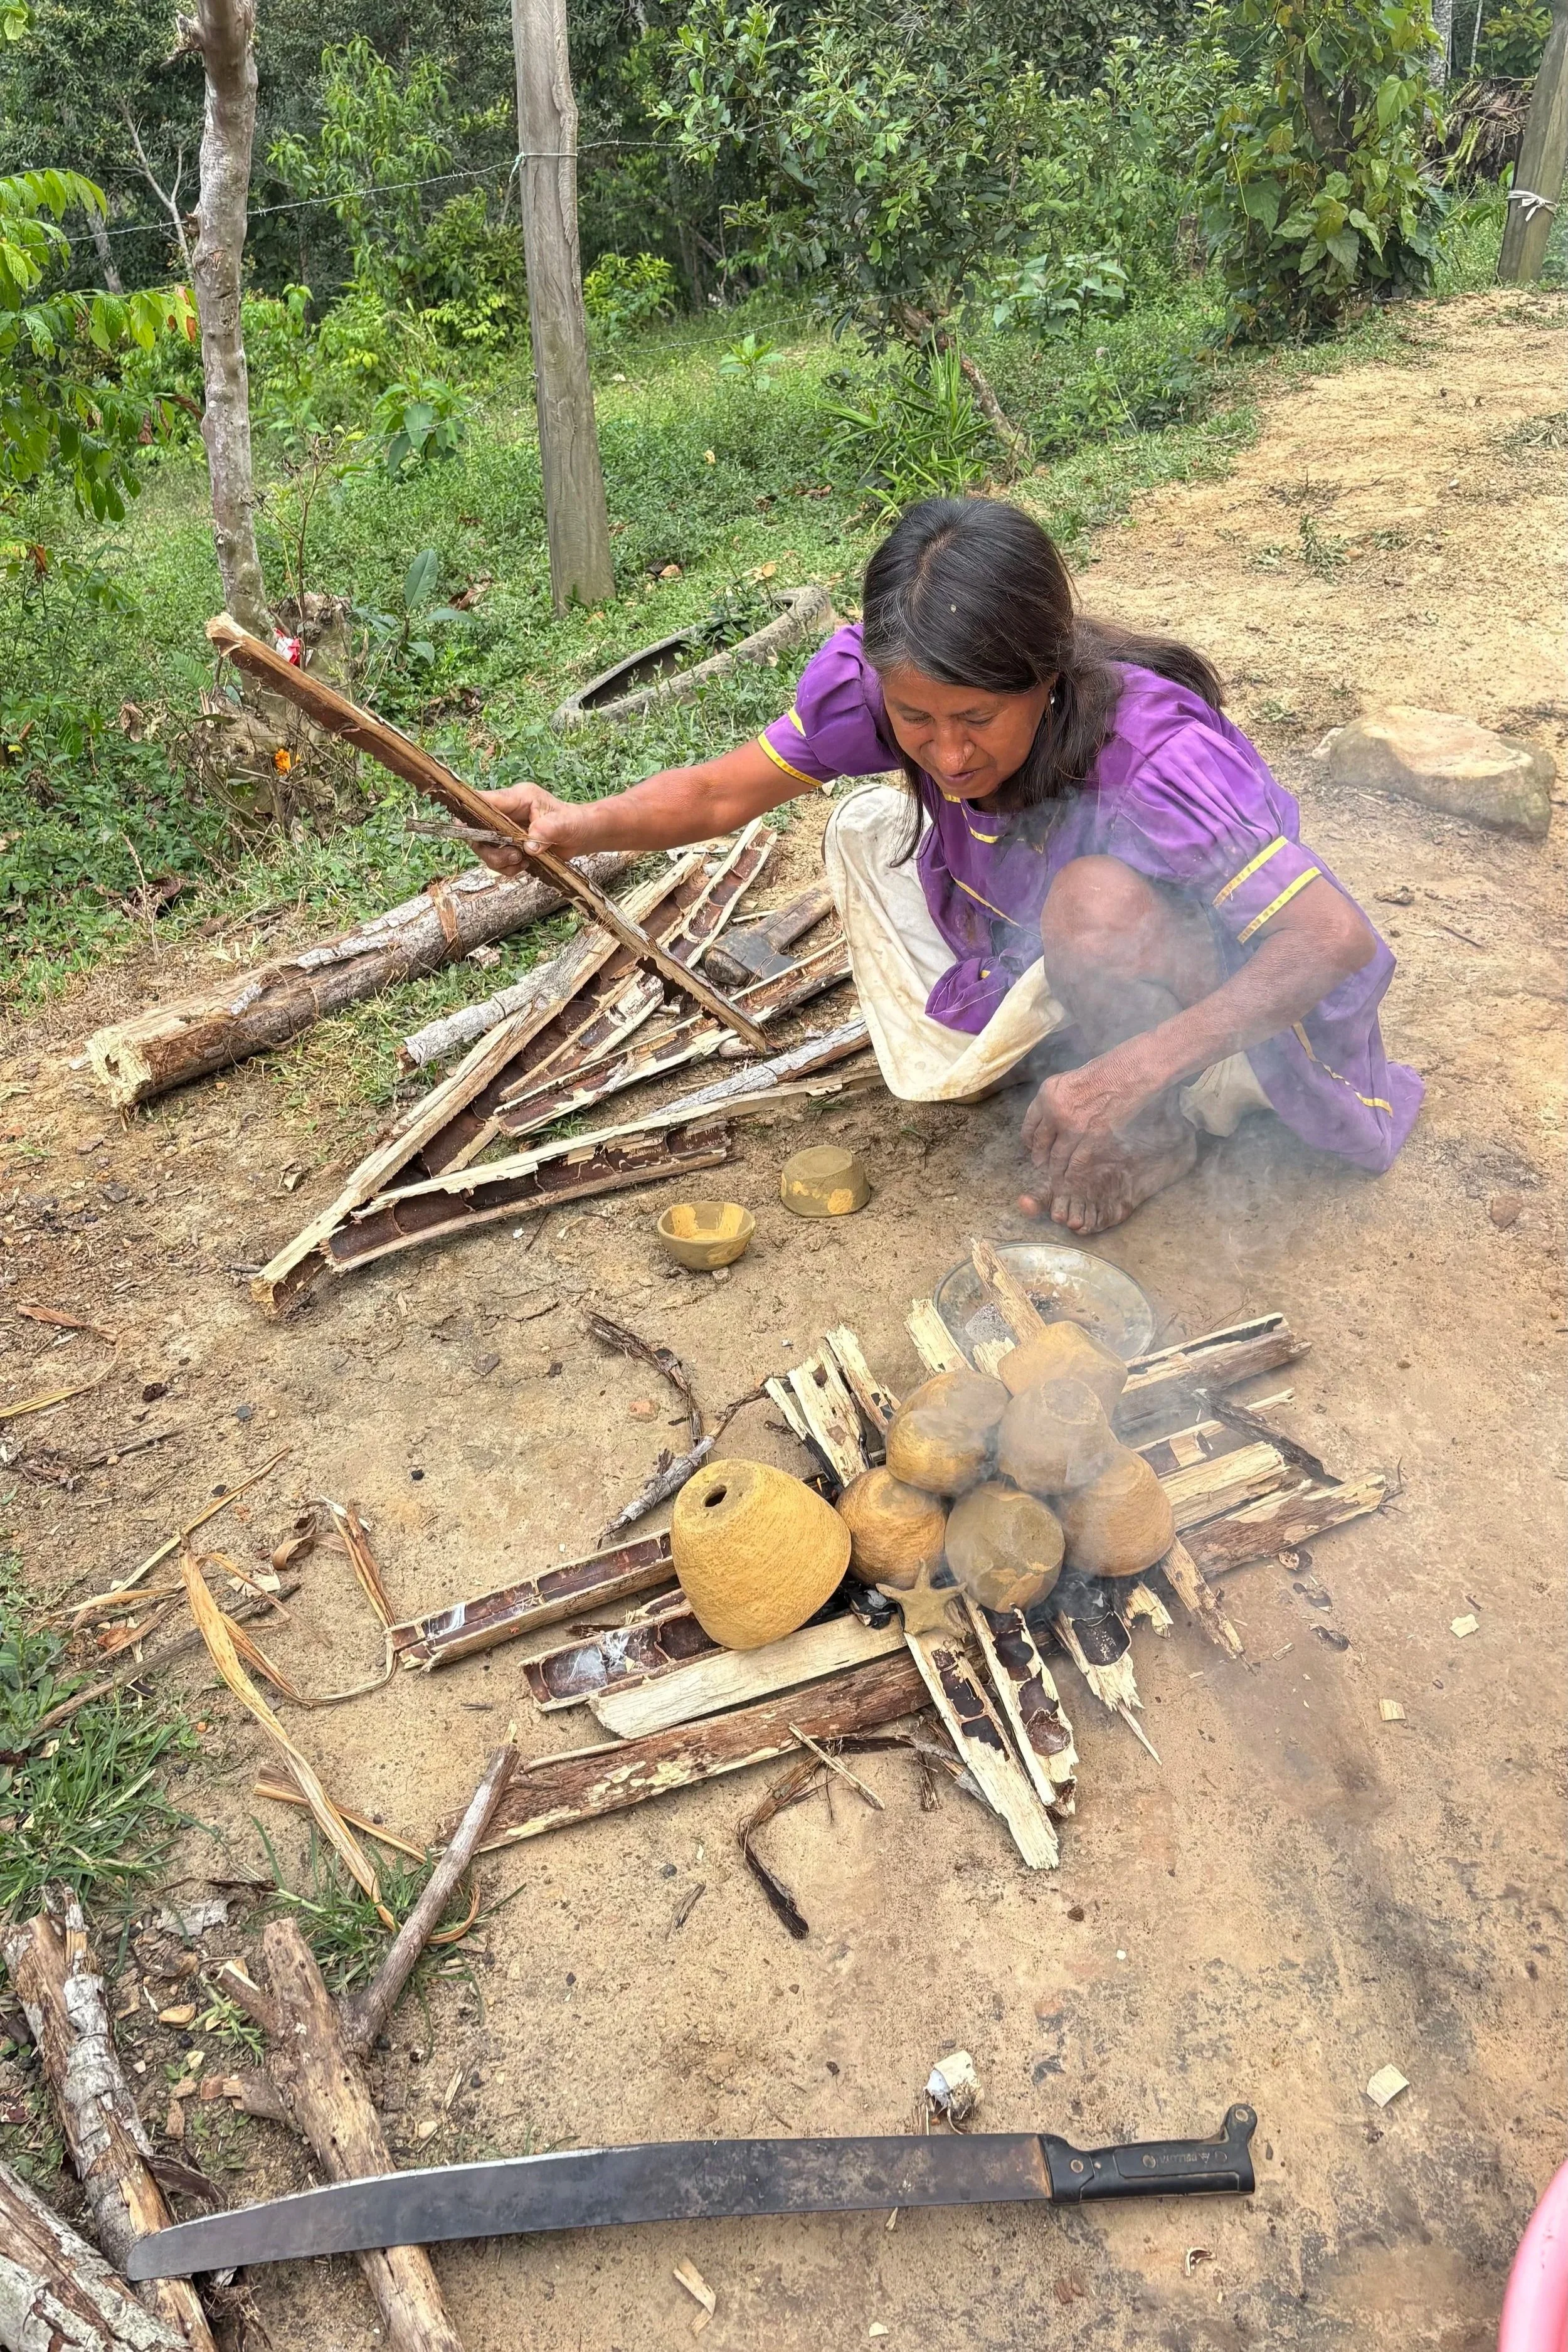
8. Firing
Traditional firing takes place in the shunto (open oven). Artisans cut pieces of fast-burning, hollow-stemmed wood and arrange them in neat rows to create a bed for coals. Pots are placed on top of the strips of wood and embers, arranged by size, and then additional wood is carefully stacked in a conical shape to completely cover them. The fire is tended to burn hot and bright for about twenty minutes.
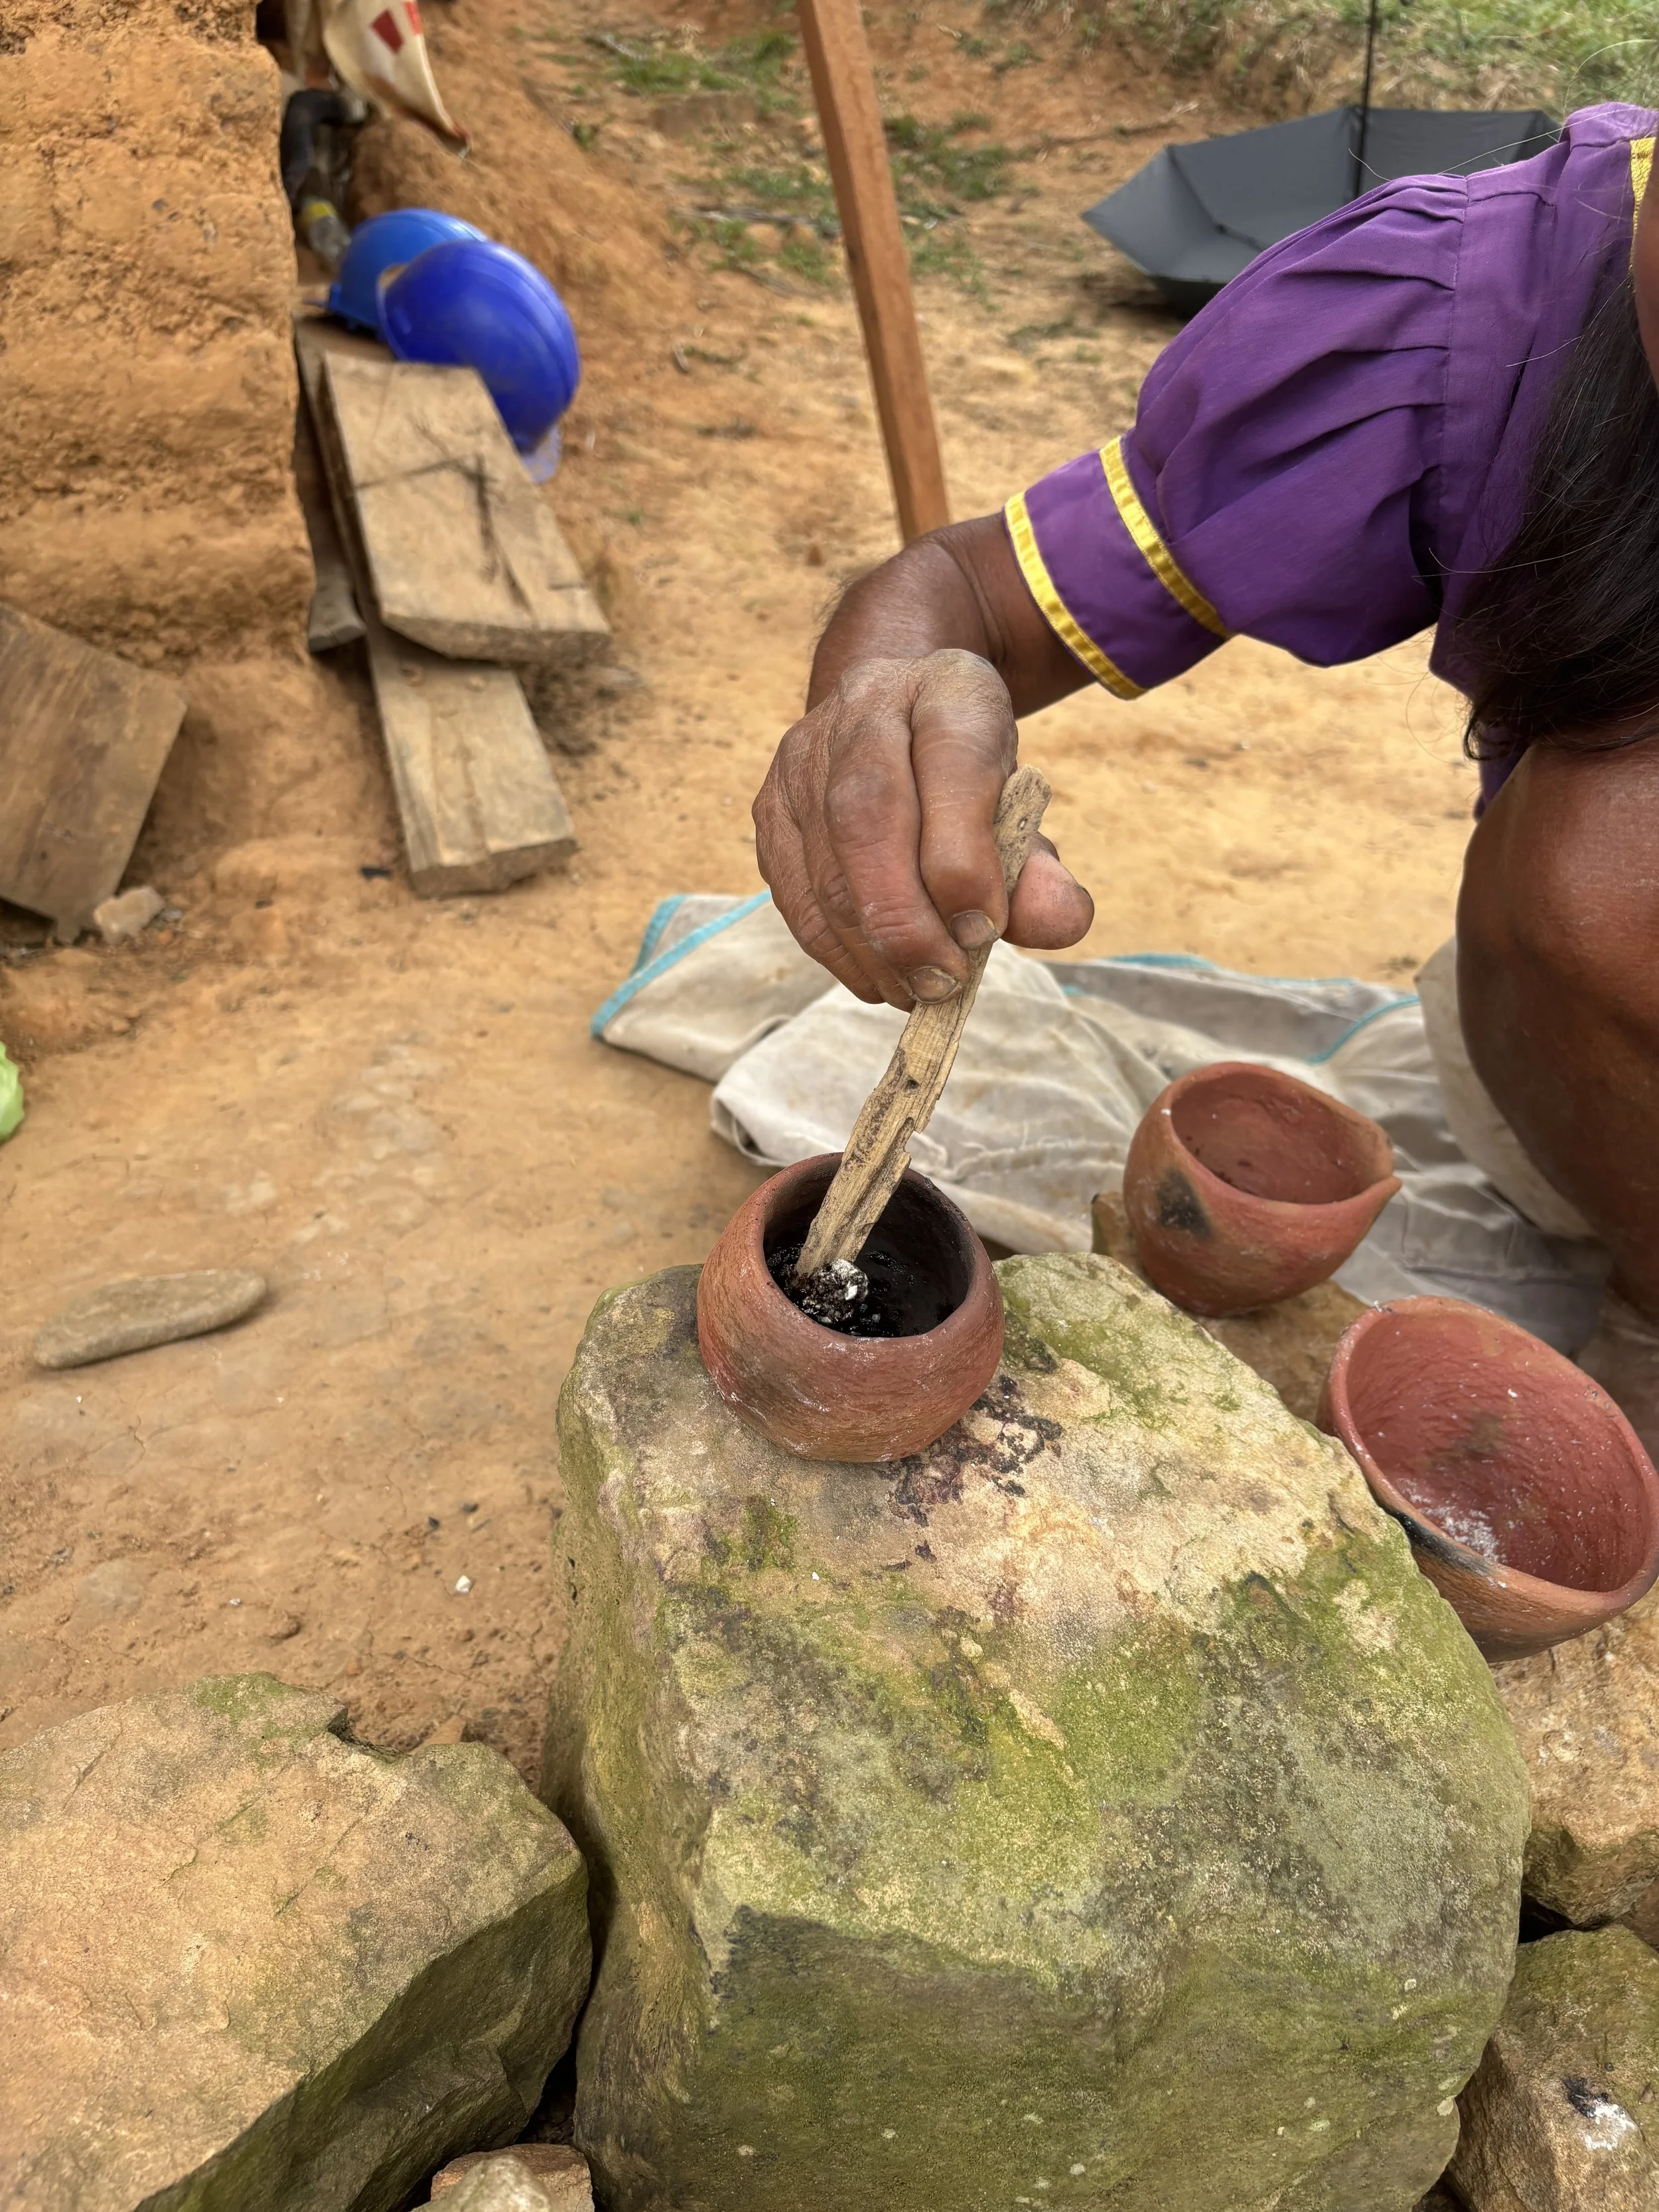
9. Waterproofing with Resin
As the fire burns down, the artisan carefully extracts the hot pieces from the coals using a stick or tool, and applies copal—a natural tree resin—to the inner walls of the vessel to waterproof it. The pot must be extremely hot during this process so the copal melts and fully coats the surface. Plant-based lacres may also be applied to the exterior at this stage to protect the decoration and provide a glossy finish.
Thank you to Guillermina and her sister in the artisan village of Wayku; to the team of women artists at the ceramics museum in Chazuta; and to the shuntu queen, Petrona, for welcoming me into her home in Chunchiwi. I’m especially grateful to Trina, for introducing me to all these incredible artists.
